Creamy White Bean Dip
Highlighted under: Light Wellness Dishes
I absolutely love whipping up this Creamy White Bean Dip for gatherings and casual get-togethers. It’s a go-to appetizer that never fails to impress! The combination of smooth white beans with garlic and herbs creates a delightful blend of flavors. Plus, it's quick to prepare and pairs wonderfully with fresh veggies or crispy crackers. Whether it's game night or a simple snack, this dip is always a hit. Trust me, once you try it, you'll want to make it again and again!
When I first made this dip, I was amazed at how something so simple could be so delicious. Using canned white beans saves time, and blending them with olive oil, garlic, and fresh herbs elevates the flavor to another level. I like to add a squeeze of lemon juice for an extra zing, which really complements the creaminess of the beans.
One of my favorite tips is to let it chill in the refrigerator for about an hour before serving. This allows the flavors to meld beautifully. I’ve even served it at parties with great success; everyone always asks for the recipe!
Why You'll Love This Recipe
- Super creamy and rich flavor that everyone will enjoy
- Healthy and satisfying, packed with protein and fiber
- Versatile dip that pairs well with various snacks and appetizers
Understanding the Ingredients
The foundation of this Creamy White Bean Dip lies in the white beans, which provide a smooth and creamy texture. I usually opt for cannellini or great northern beans, as they have a mild flavor that allows the other ingredients to shine. Rinsing and draining them thoroughly is crucial to remove excess sodium and ensure the dip is not overly salty. This step also helps achieve that silky consistency that makes the dip so appealing.
Olive oil not only enhances the dip's creaminess but also adds a rich flavor that balances the acidity from the lemon juice. If you're looking for a lighter alternative, avocado oil can work as well, though it adds a slight fruitiness. Additionally, the use of fresh garlic is key; it brings a punch of flavor that elevates the entire dip. Make sure to mince it finely so that it integrates well into the mixture without overwhelming bites.
Blending Tips for Perfection
When blending the dip, it's essential to be patient. I recommend blending on a low setting first, gradually increasing to high until you achieve a creamy, smooth consistency. If your mixture seems too thick, add a splash of water or another drizzle of olive oil to assist in blending. Another useful tool is a spatula; use it to scrape down the sides of the food processor to ensure all ingredients are mixed uniformly and fully incorporated.
Watching the texture is critical; aim for a glossy finish without any lumps. If you notice the dip is still grainy after a couple of minutes, it may need additional blending time. As a general rule, blend for at least 2-3 minutes, but feel free to adjust based on your food processor’s power. The goal is to create a dip that spreads easily on your favorite crackers or veggies, so be diligent in this step.
Serving and Storage Suggestions
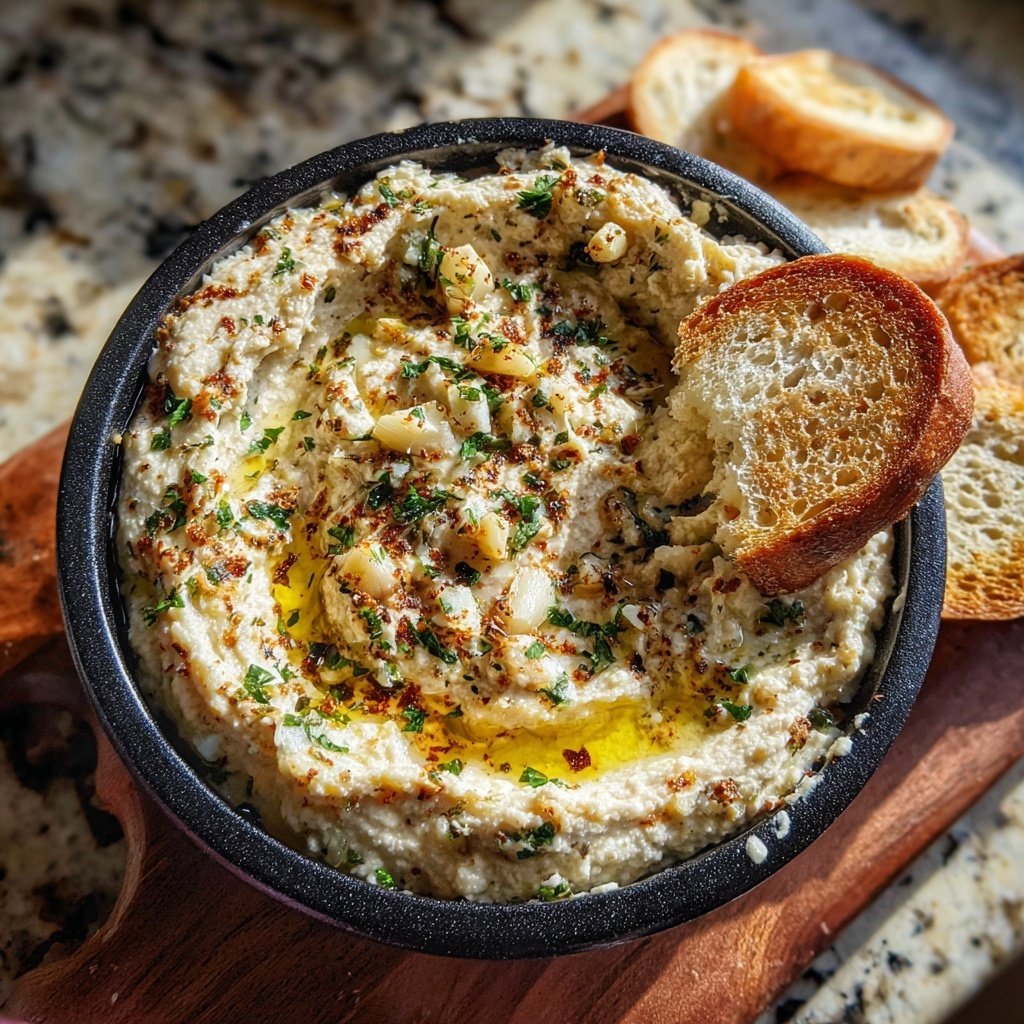
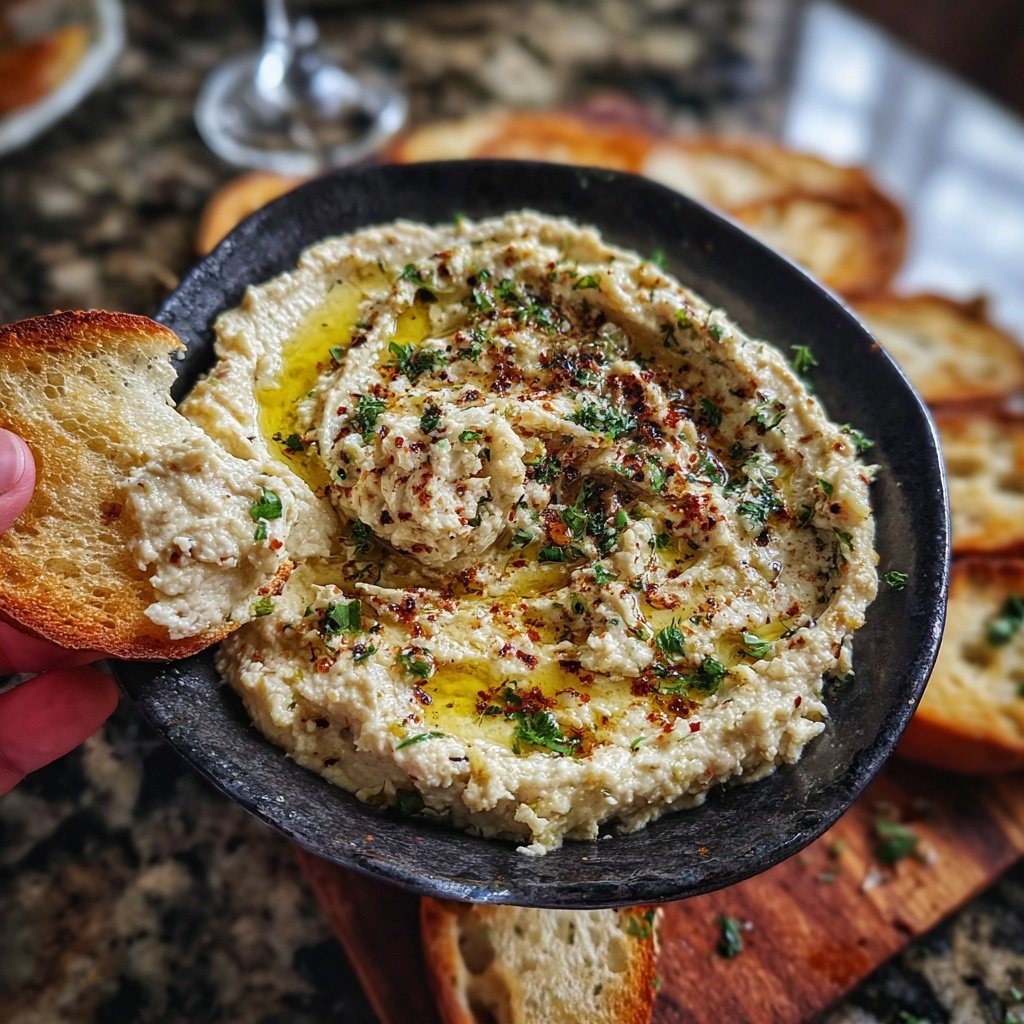
This dip is not just for casual snacking; it makes for an excellent addition to a charcuterie board. Pair it with an array of fresh veggies like cucumbers, carrot sticks, or bell pepper strips for a vibrant platter. Additionally, consider serving it with a variety of crackers or pita chips for a delightful crunch. For an added touch, drizzle a bit of extra virgin olive oil over the top just before serving to enhance the visual appeal and flavor.
If you're looking to make this dip ahead of time, it's great for meal prep! Store it in an airtight container in the refrigerator for up to 3 days. The flavors only get better as they meld together. However, avoid freezing, as the texture may become grainy when thawed. When you're ready to serve, simply stir it again to bring it back to life. If it thickens in the fridge, a touch of water can help restore its creamy consistency.
Ingredients
Gather these simple ingredients to create your delicious dip:
Ingredients
- 1 can (15 oz) white beans, drained and rinsed
- 2 tablespoons olive oil
- 1 clove garlic, minced
- 1 tablespoon fresh lemon juice
- 1 teaspoon dried oregano
- Salt and pepper to taste
- Fresh parsley for garnish
Now that you have your ingredients ready, let's move on to the preparation!
Instructions
Here’s how to make this creamy and delicious dip:
Blend the Ingredients
In a food processor, combine the white beans, olive oil, minced garlic, lemon juice, dried oregano, salt, and pepper. Blend until smooth and creamy, scraping down the sides as necessary.
Adjust Seasoning
Taste the dip and adjust the seasoning as needed. You can add more lemon juice for acidity or extra salt for flavor.
Chill and Serve
Transfer the dip to a serving bowl, cover, and refrigerate for at least 30 minutes to allow the flavors to meld together. Before serving, garnish with freshly chopped parsley.
Voilà! Your Creamy White Bean Dip is ready to be enjoyed!
Pro Tips
- For an extra kick, try adding a pinch of red pepper flakes or a dash of hot sauce. Also, this dip can be made a day ahead
- just mix it well before serving to get that creamy consistency back.
Flavor Variations
Feel free to customize this dip to suit your taste preferences! You can experiment with fresh herbs like basil or thyme instead of oregano to introduce a different flavor profile. For a spicy kick, add a pinch of red pepper flakes or a dash of hot sauce; this pairs nicely with the creamy texture for those who enjoy a little heat. Another fun variation is to incorporate roasted red peppers or sun-dried tomatoes for a sweeter, tangier flavor.
Cheese lovers might consider mixing in a small amount of feta or goat cheese for an added creaminess and depth. However, keep in mind that these ingredients can change the overall texture, so blend in small amounts until you achieve your desired consistency. Don't hesitate to lean into your creativity—this dip is versatile enough to handle a variety of flavors!
Dietary Adjustments
For a vegan option, this Creamy White Bean Dip is already suitable as it contains no animal products. However, if you need to make it gluten-free, ensure any serving accompaniments like crackers are certified gluten-free. Check labels even on vegetables to avoid hidden sources of gluten, especially in pre-packaged items.
If you're aiming to reduce calories, you can use less olive oil or substitute with low-fat yogurt. This will change the overall flavor and texture slightly but still yield a delicious dip. Experimenting with different ingredients is encouraged—what’s most important is that you enjoy the process!
Questions About Recipes
→ Can I use dried beans instead of canned?
Yes, you can use dried beans. Just be sure to soak and cook them beforehand.
→ How long can I store the dip in the refrigerator?
The dip can be stored in an airtight container in the fridge for up to 5 days.
→ What can I serve this dip with?
This dip pairs perfectly with pita chips, fresh vegetables, or even spread on sandwiches!
→ Can I make this dip vegan?
Yes, this recipe is naturally vegan as it does not contain any animal products.
Creamy White Bean Dip
Created by: Ella Townsend
Recipe Type: Light Wellness Dishes
Skill Level: Easy
Final Quantity: 8 servings
What You'll Need
Ingredients
- 1 can (15 oz) white beans, drained and rinsed
- 2 tablespoons olive oil
- 1 clove garlic, minced
- 1 tablespoon fresh lemon juice
- 1 teaspoon dried oregano
- Salt and pepper to taste
- Fresh parsley for garnish
How-To Steps
In a food processor, combine the white beans, olive oil, minced garlic, lemon juice, dried oregano, salt, and pepper. Blend until smooth and creamy, scraping down the sides as necessary.
Taste the dip and adjust the seasoning as needed. You can add more lemon juice for acidity or extra salt for flavor.
Transfer the dip to a serving bowl, cover, and refrigerate for at least 30 minutes to allow the flavors to meld together. Before serving, garnish with freshly chopped parsley.
Extra Tips
- For an extra kick, try adding a pinch of red pepper flakes or a dash of hot sauce. Also, this dip can be made a day ahead
- just mix it well before serving to get that creamy consistency back.
Nutritional Breakdown (Per Serving)
- Calories: 120 kcal
- Total Fat: 8g
- Saturated Fat: 1g
- Cholesterol: 0mg
- Sodium: 200mg
- Total Carbohydrates: 12g
- Dietary Fiber: 4g
- Sugars: 1g
- Protein: 4g